Showing posts with label cooking. Show all posts

Saturday, August 6, 2011

Adventures in Canning

Well, I've done it again.  It's been over a month since the last post.  But that's mostly because I've been busy with my new internship!

Yes, I finally got one.  It was very short notice, so I wasn't able to give my other job enough notice to get out of most of my shifts,  which made July the month of no days off.  I just lacked the mental energy to force out a or even think about a post.  Other than that (and the strain on my back from bending over a microscope all day) it's been a really great experience so far, and I'm glad I have the opportunity to do it.

I've been up to many a nifty thing in the last month.  I'll be sure to update you on all of it in the very near future.  But for now, let's talk about canning cherries!


This week, I tried my hand at canning for the first time!  Okanagan cherries were on for $2.99/lb at the produce store, so, naturally, I bought about ten pounds over the course of the week.  I shared, ate and froze eight pounds, but two of them went into the great canning experiment.

I've got to admit, canning is terrifying the first time if you're the worrying type.  It sure was for me, at least.  Are the jars and lids sterilized?  What's that sound?  Did they seal?  Did I wipe the rims well enough?  Is the water hot enough?  WHAT IF I EAT IT AND DIE?!

Well, I'm happy to report that I did open one of the jars, and I did eat it, and I did NOT die.  They're even pretty darn tasty.  I used this recipe from Simple Bites' Canning 101 Series.  I made three 250mL jars each of the vanilla and almond variations.  It was easy, pretty quick, and I'm pretty happy with the result. I might use tall jars instead of short and maybe a slightly heavier syrup next time though.  It's also a good idea to make an effort to keep the types separated.  I forgot which jar was which before I could label them.

If you're thinking about home preserving, you should really give it a try.  It was scary, but really rewarding.  And the second time, you'll be experienced, so it won't be scary any more!

Sunday, June 5, 2011

Happy Birthday, Sylvia!

Wowza.  Has it ever been a busy week.  This is the first time since Thursday that I've had a chance to sit down and post.

It was my good friend Sylvia's twenty-fifth birthday last week.  As part of her gift, I made the cake for her party.  The cake is one of the things that I was so busy with, and it was totally worth it.  It turned out even better than I expected, and she loved it!


AND I finally had an excuse to use the cake stand I got for Christmas!


It was Swiss chocolate cake with French Vanilla whipped icing, and it was pretty darn tasty. The lettering and decorations are piped chocolate and purple sugar.  Not too shabby for a boxed cake mix and canned frosting.

It was so much fun to make. There will be many more baked goods in the near future.

Monday, May 16, 2011

Kale Chips Recipe

Good morning!  I hope it's a beautiful spring day where you are.  Victoria is warm, grey and drizzly.  It's a great day to stay inside, watch the cherry blossom petals blow in the wind and listen to the birds sing.

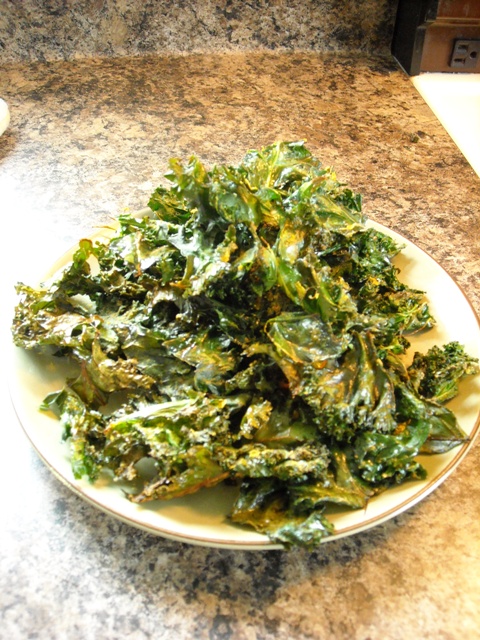
Grey days are just perfect for cooking, then curling up to snack on your homemade goodies with a good book.  The best, easiest, tastiest and healthiest snack I know how to make is kale chips.  They're savoury and crunchy like chips or crackers, but they're made with a healthy green veggy and cheesy, B-vitamine packed nutritional yeast (AKA, catnip for vegetarians and vegans).  What's not to love?


This recipe serves one or two people.  I'm kind of a bottomless pit, so I'm usually content to eat the whole batch.


Ingredients:


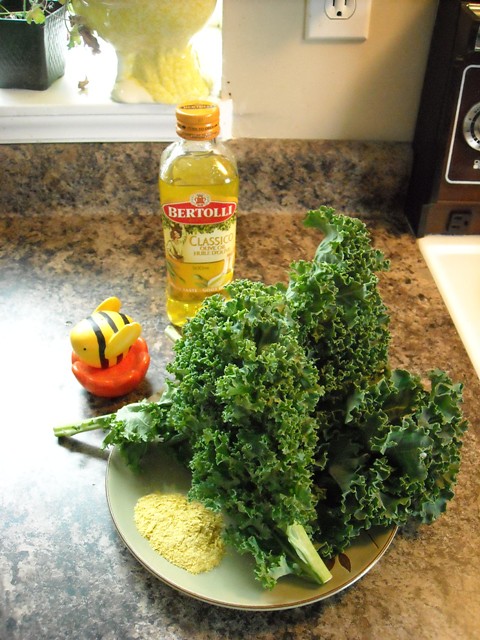
Curly Kale, about 3 big leaves
Olive Oil (I like plain ol' olive oil, not extra virgin), about 2 tsp
Nutritional Yeast Flakes (some stores will call it Red Star or engevita yeast.  Powder is fine if you can't find flakes, but the texture won't be quite the same), about 1 tbsp
Salt and Pepper to taste

Instructions

Preheat your oven to 350F.

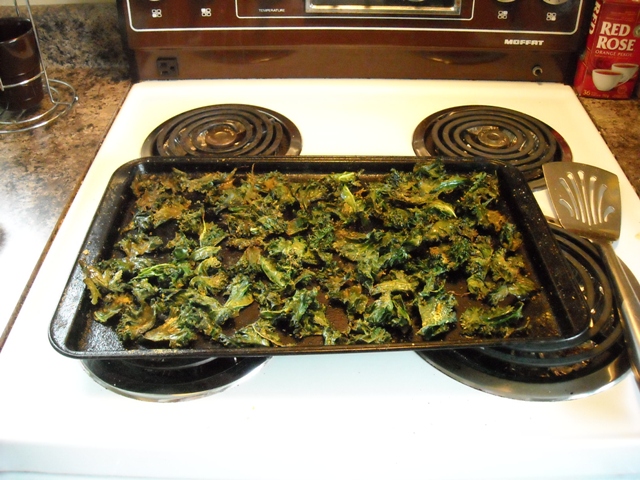
Wash and dry the kale.  Discard the tough stem/centre rib and rip the leaves into bite sized pieces.  Place the kale on a baking tray, sprinkle on a little bit of oil and toss to coat the leaves.  It might look like you need more than 2 tsp when you're sprinkling the oil on, but you probably don't.  You'll see when you toss the kale that you have enough.  Spread the kale out in single layer on the baking sheet.  Sprinkle on the salt, pepper and yeast. 


Pop the kale in the oven for about 7 minutes, but keep an eye on it. When the kale has shrunk quite a bit and is looking crispy, pull out the tray and flip the kale over.  Return it to the oven for about 3-5 more minutes.  If the edges are starting to turn a little brown, they're done!


Put the kale chips in a bowl, let them cool for a second, then turn on a good movie and start munching away.

Feel free to mess with the seasoning.  This would be great with Cajun spices.  Or you can use sesame oil instead of olive oil and top it with some chili flakes, sesame seeds and Asian spices. 

Now, I'm off to make a big batch of these and stuff my face.  I hope you give them a try, too (let me know if you do!).  Enjoy!